
First posted 2018-01-02
After reading about smart LEDs a while ago, I’ve been looking for a reason to play with them. In most TV productions this would be squarely within the world of the Lighting Department, so it might be while until I got the chance. Christmas lights around the outside of my house seemed like a good first foray!
In this first post, I’ll cover the major design decisions of the system. I plan at least two further posts to cover how I put it together, how I controlled the thing, and maybe what I plan to improve for Christmas 2018!
Choice of chip
I have plenty of experience controlling RGB and RGBW LED strips plugged into dimmers using DMX. These are very common on TV sets. Since the purpose of this project was to play with “smart” LEDs, my first task was to select a chip. A smart LED consists of 1 to 4 LEDs and some kind of controller in a single package no bigger than 50mm by 50mm. The LEDs themselves tend to be red, green and blue. Because white never looks great when you use RGB LEDs, you can also get various fixed temperatures of white either on their own or in the same package.
)](/images/smart-led-christmas-lights/2.jpg)
APA 102 chip (Adafruit)
The more interesting part is the controller. There are many types available, some with subtle variations introduced as designs are reverse-engineered and copied between manufacturers. All controllers take in data on one end, pick off the data for their LEDs, and pass the data out with some kind of address increment. That make the system self addressing. If you’ve ever had to manually set addresses on hundreds of light fixtures (like, say, the gameboard on Family Feud), that might be enough to make your eyes light up. They all apply some degree of power regulation to tolerate slight voltage drops, discussed more below. When they decode the data relevant to their onboard LEDs, they use the same PWM techniques as any other LED dimmer to achieve the requested brightness.
The major differentiating factors are:
- Speed of PWM. Too slow and you’ll notice the flicker, especially if you ever point a camera at it.
- Data rate. Too slow and your desired refresh rate will seriously limit the number of channels you can use in a single run, or vice-versa.
- Transmission method. Some get by with a single data line, other need a separate clock.
- Voltage regulation. It looks like all controllers run on 5v ultimately, but some will step-down higher voltages. Running at a higher voltage is useful if you want mitigate voltage-drop, which is gets worse the lower the voltage gets. Some strips seem to have their own voltage regulation, independent of the LED packages themselves.
- Color depth. Some chips offer as little as 7 bits per channel, others offer 16. With such a big dynamic range, way more than even a high-end TV, I think the case for more than 8 bits is pretty strong, especially without any master brightness control.
It seems like the first popular controller was the WS2813, known as the NeoPixel by AdaFruit. They are still popular because of their price and the fact that strips of them are quite robust. Along with close relatives, they also come with the greatest number of variations, including higher voltage options, RGB+warm white, RGB+cool white etc. I rejected these for 3 main reasons:
Low PWM rates (400Hz)
Whilst I don’t plan on making a TV show at my house, it doesn’t seem worth getting familiar with a chip which would not be suitable for professional use. I also tend to find the “rainbow” effect very noticable. I catch strange effects while flicking my eyes away from DLP projectors or many LED light fixtures.
Low data rates (800KHz)
My plan was to run at least 1,800 channels (20m x 30pixels/m x RGB) in a contiguous run. I calculated that would put my refresh rate at below 30Hz. My minimum spec is 60Hz.
Time-sensitive protocol
The one-wire data protocol requires precise timings which can only be achieved by realtime processing. That rules out Linux or Windows-based devices, which might shutdown future tinkering ability. There are successful projects using Arduino, however.
There’s a newer controller called APA-102 and a modified clone called SK9822. These are better on all three fronts. Their protocols require a separate clock line which means they are not time-sensitive and can be clocked up to 32MHz; 40x the WS2813! The PWM runs at 20KHz; 50x the WS2813 and way too fast to beat with camera shutters or moving eyes. The biggest downside I could find was lack of color and voltage options. I could only find white-only or RGB-only. Given the choice I would have gone for RGBWW, to give me the option of switching to a more traditional-looking warm-white mode. 12v or 24v would also have simplified power distribution. I decided this was the best compromise and that I would have to find a clever way to run 20m of finicky 5v myself.
Choice of strip
APA-102 strips are readily available in either 30, 60 or 120 pixels per meter. Since my early power calculations were already scaring me, and the minimum viewing distance was at least 10m, I opted for 30 pixels/m.
)](/images/smart-led-christmas-lights/3.jpg)
Reel of APA 102 chips (Wells)
I love the Adafruit website because they have a huge amount of support for everything they sell. They sell APA-102 strips at 30 pixels/m with weatherproofing at $20/m under the name Dotstar. Alas, I was able to find very similar products on AliExpress for $6.90/m. Even accounting for the AliBaba lottery factor, 65% off was too much to ignore.
I ended up buying 4x 5m 30p/m IP67 from the renowned Chinese lighting manufacturer, Wells 🙃. Flash forward 5 weeks, it turns out that 3 our of 4 strips works perfectly. After getting the run-around regarding a replacement, I cut off the first section of the broken strip and found the next section worked just fine. After resoldering and resealing with silicone, 19.5 out of 20 meters were good. Lottery won!
Choice of controller
Having chosen the APA-102, I could did briefly consider running everything from an Arduino (maybe using the FastLED library) or Raspberry Pi using some custom code and maybe some extra electronics. I quickly realized that I did not feel like putting in that much time before even getting my first pixel to turn on. I’d rather save the fun for a higher level, playing videos and generating patterns. Apart from that, there are several very good-value pre-built boards out there. Since I already have a software stack I am happy with for sACN, I wanted a board which could receive levels in that format and translate them to the APA-102’s protocol. This quickly narrowed the field to two contenders, one from New Zealand and the other from Australia. I haven’t yet worked out why there are so many great antipodean lighting technology companies, also including EntTec.
LeDMX4 PRO
- 4 outputs.
- 5A from each output.
- 680 RGB nodes from each output.
- Built-in playback and recording.
- $129.

DmxKing
The number of supported nodes has doubled since I did my original research, but it still falls short of the updated PixLight 4.
PixLight 4 MkII
- 4 outputs.
- 7.5A from each output.
- 1020 RGB nodes from each output.
- $129
)](/images/smart-led-christmas-lights/5.jpg)
Advatek PixLight board (Advatek)
This revision was imminent just as I was doing my research. It increased the data rate and number of nodes, which was significant to me because I was planning a contiguous run. To option to go round the whole house with one or two outputs was important. An extra output is no use if it’s 20m away from where it’s needed because The LED protocol is designed for a maximum distance of 5m.
I’m sure the LeDMX would have been fine, but I ended up getting a personal recommendation for PixLight and I couldn’t turn down the superior power and data handling. One downside is that I will forever more be confused between Advatek and Adventech, whose hardware interfaces I often use for button inputs like gameshow buzzers.
Unfortunately, neither interface supports the global-dimming feature of the APA-102. I hope Advatek implement it in future. 24 bit color is not really enough when you need to apply global dimming so that you don’t light up your neighbors’ yards after dark. The gamma curve of these chips seems to mean that the don’t get a lot darker until about 10%, at which point you’re working with less than 18 bits of color. Choice of Power Supply
After re-familiarizing myself with the relevant formulae for voltage, distance and cable diameter, I confirmed that running at the strips’ native 5v was not an option. The copper alone would have cost more than the rest of the project and maybe affected the structural integrity of my house. It turns out that even the 5m strips themselves are too long for 5v. Without being powered at both ends, 100% white started to fade in the middle and was distinctly orange by the end. That’s because the blue LEDs fall off first, followed by green, with red being most efficient. In other words, falloff is not just darkening, it’s an intolerable shift in hue.
The clear choice was to run all power at a higher voltage and step it down with DC-DC converters at each strip intersection. Even 20m of low density strip has a big enough power requirement that it’s hard to find a single power supply up to the task at anything less than 24v, so that seemed like an easy choice. I was able to leave enough headroom that I could extend in future without adding another power supply.
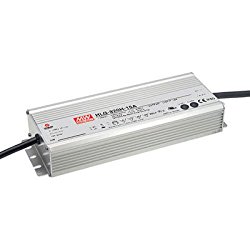
Despite sounding like a bad translation, the gold standard in this space appears to be MeanWell. Although I had not heard of them until this project, I guess the fact that there is a big problem with counterfeit MeanWell power supplies shows that they are in demand. In the spirit of over-engineering and keeping options open, I decided to go with an IP67-rated, 320W model, the HLG-320H-24. It has an option to adjust the output voltage using a resistor, but I will be regulating later anyway, maximum voltage is good for me!
Meanwell power supply (Image by Amazon)
The next step was to choose the DC bucks. Again I was surprised to find that my relatively modest project was pushing the envelope of hardware specifications. I found some stepdown regulators on Pololu which looked very nice, but would have been running on the ragged edge to power one 5m strip. I ended up with these regulators from Amazon. Cheaper, higher output and more of a gamble. Spoiler: the gamble has paid off so far.
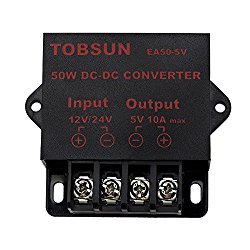
DC buck (Image by Amazon)
Choice of Mapping software
So now I’ve got some LED strips and a board to convert sACN to the necessary protocol. How am I going to generate some beauty and spout it out as sACN? Well, I considered ELM by EntTech first, because I have used it before for studio LED mapping. After playing with ELM with this application in mind, I decided that it was both overkill for a 600x1 strip and under-specified for unattended operation. Believe it or not, I was not intending to do live operation of my Christmas lights 12 hours a day for the month of December. I would have had to write my own application to control ELM and pay out $125-$250.
I had heard of LightJams, but I didn’t really know what it was. I worked out that it was the codebase on which ELM was based. I played with it for about an hour. It seems to be intended as an even more interactive, real-time tool to generate live textures as an accompaniment to music. That’s a cool idea, but even further from what I wanted. Maybe something to play with in future though!
In the end I decided to roll my own, based on my favorite sACN library on GitHub. I plan to write a separate blog post with some more details of what I came up with, but it allows various source types to be scheduled including movies, chases, sparkling and other simple code-based effects. Everything is handled in floating-point HSL for easy pipelining and realtime adjustment. To be continued
Now that I’ve described the key design decisions, in the next part I’ll describe how I stuck them together to begin generating Christmas cheer.

Hamish Barjonas
Creator of custom software for TV and live production. Maker, home automation, audio and video enthusiast.